This is the fourth lesson in our Contacts Area Series. We've looked at Fields, using the Easy Form, and now we're going to see another way to upload contacts into Channel.
If you want to upload many contacts at once, getting to know the File Upload option will help you import a batch, or multiple contacts, all at the same time. You can do this by using a Comma Separated Value (.CSV) spreadsheet. Anyone can do this with access to any spreadsheet program, such as Microsoft Excel.
The video will guide you through your first File Upload import. There are a few things you should know about using this option:
Before you choose to “Upload” your new connections, you’ll see the two below options. The first is “Optional Opt-In Override” and the second is “Add only if email address is not already in all contacts.” Both of these options are important to having a successful upload. Here’s more information on both of these:
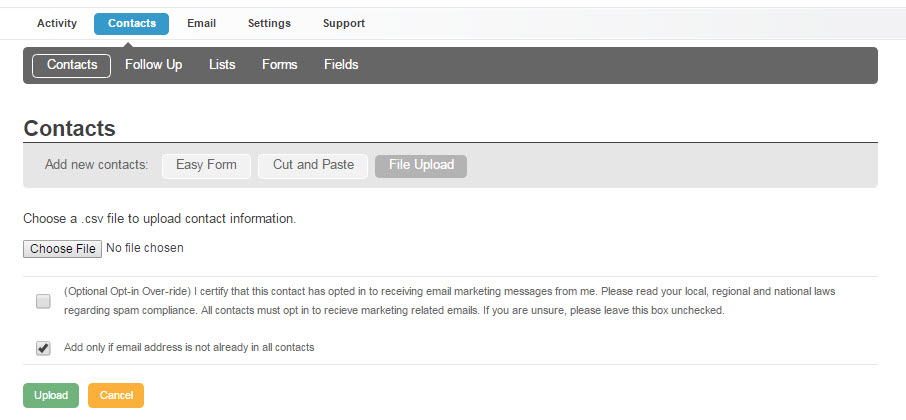
We’ll start by clicking the File Upload button under Contacts.
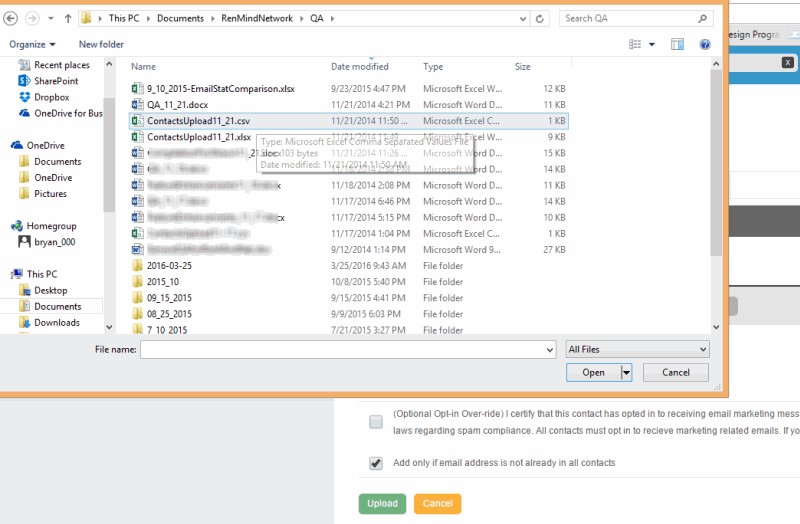
When you click on the “Choose File” button you will be taken to the file directory on your computer. You’ll want to navigate to the folder that contains the file you want to upload. Make sure that the file has the .csv file extension:
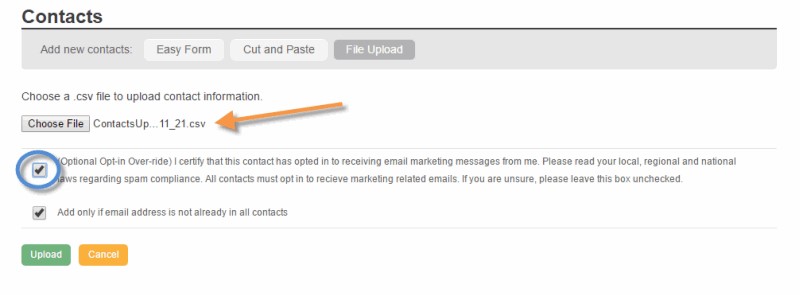
When you select to open your .csv file you can see that you’re led back to the File Upload page. Note the arrow that shows your file is ready to be uploaded. Also, see the blue circle that points out the “Optional Opt-in Override” selection. If you have permission to send bulk communication (email newsletters) to these contacts, then you should check this box. Otherwise, they will be left out of mass email communication unless manually changed later.
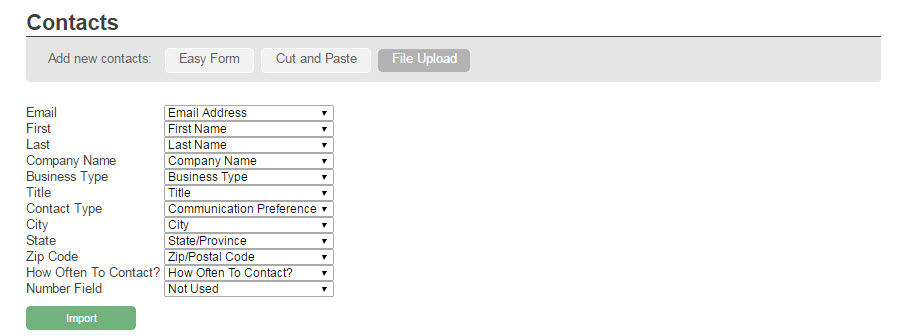
Once you click the upload button the system will process your list to pull in each contact. You will be taken a page that looks like the one below. This will let you match the column headers (on the left side) from your spreadsheet with the fields you’ve already set in the Fields area (to the right side). Make sure each category meets up with the contact you see. You want the email to meet up with the email field, city with city, etc… It’s good practice to name the column headers something similar to the Fields you’ve already set. This way you can be sure that similar data will be easy to identify during the upload process. It takes out the guess work. It will look like the image below:
When you go back to your contacts area you can see that the contact Nicki has been added into your contacts area. Take the chance to look up a few of the contacts you’ve just imported and make sure they’re Subscribed. Now you’re ready to send them email newsletter information.
Any time someone signs up through one of your promotions through Review, Offer, Giveaway or a contact form they will automatically be pulled into your Contacts Area. It works much like any of these upload methods. When you’re given permission to send a contact bulk email you can see that on the far right where it says if they are Subscribed or Unsubscribed.
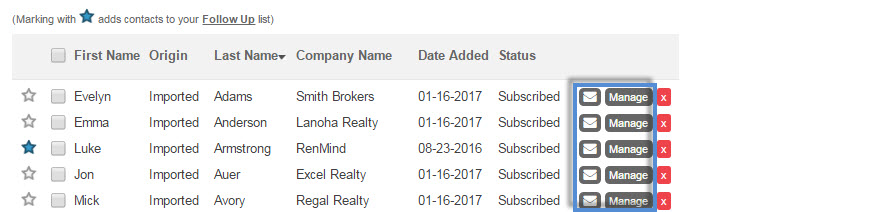
Any of the contacts you have in the Contacts area can still be sent a Single Email (envelope icon on the right), and you can also keep updating their information in their notes. For more on these features, take a look at the last lesson in this series, 'Managing Contacts'.


